Showing posts with label Home. Show all posts

Aug 22, 2014

Fun Food Friday Begins Now!

I'm trying something new, and fingers crossed I can keep it up.  This is the first in a series of posts called called "Fun Food Friday".  As the name implies: 

It's fun! 
It's all about food! 
and 
I'll post a new one each Friday!   

This first post is all about Bento, and you'll see more in the future, as inspiration for those friends of mine who are in a lunch packing rut.

Traditionally, bento is japanese for lunch box and refers to any boxed lunch, but it has evolved into much more.  If you're new to Bento, take a moment and check out my Beginning Bento post from 2 years ago.  

I am in love with Bento style lunches.  They are fun to make, fun to eat and the kids always praise my efforts.   
I'm praise driven, so that's huge!   

Here is one "bento style" lunch packed 3 ways.  Each includes:

1 lean chicken hotdog 
(cut in half so it looks like 2)
1 oz of cheese cut into tiny cubes
 carrots, celery, grapes 
and a tiny piece of a chocolate bar as a treat. 
  
The first is for my youngest, he loves his adorable teddy bear box.  He's super skinny, and if he grows any taller or looses another ounce he'll be technically underweight.   I give him about the same as my older kids hoping he'll eat more than I'd expect.  Don't tell the big kids, but he got more cheese than them. 

http://www.allthingsforsale.com/bento-box-lunch-box/2980-rilakkuma-die-cut-bento-lunch-box-with-removable-divider-4974413585637.html

This next one is for my daughter.  She picked out this pink sheep box herself.  She's not a huge celery fan, but loves fruit so she has less celery and more grapes.  
http://www.allthingsforsale.com/bento-box-lunch-box/2753-japanese-bento-lunch-box-set-sheep-4973307168987.html

This last one is for my oldest son.  He's not in to cutesy stuff, so this simple bento box suits him well.
He's a normal weight and loves crunchy foods, so he gets lots of celery and carrots.
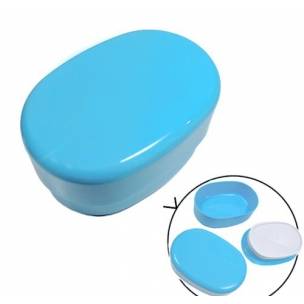
http://www.allthingsforsale.com/bento-box-lunch-box/1786-microwavable-oval-2-tier-bento-box-lunch-box-blue-4560219031265.html

Want more bento ideas?

Check out these links for more ideas and recipes:

I'm not affiliated with the site below in any way, but I love their selection of bento boxes and accessories.

Do you have a bento picture you want to share?  
Let me know and I'll post it to inspire others. 

Jan 10, 2014

Free Handrail Plans for Bunk /Loft Bed Storage Steps


This stair rail was made ages ago, when we redid the boys room at the old house.  They were designed by me as part of a 3 piece storage stair system for my son's loft bed, which I modified from plans by Ana White.  

The system I designed includes storage stairs, a shallow bookcase at the top of the stairs, and a hand rail.  Since I admire Ana White so much, I have made my plans available to you for free here on my blog.  I hope you find them useful.

Approximate Finished Dimensions:
29" H x 2 1/2" W x 4 " D


Materials:
2 - 2x2 @ 6 ft
1 - 1x3 @ 6 ft
1 - 2'x4' Masonite project panel 


Cut List:
2- 2x2 @ 1'6 3/4" (ends cut at 45 degree angles as shown in illustration below.  This will be baluster 1 and 2)
1- 2x2 @ 2'10 9/16" (ends cut at 45 degree angles as shown in illustration below.  This will be baluster 3)
1- 2x2 @ 10"  (cross brace 1)
1- 2x2 @ 1'2 1/4" (cross Brace 2)
1- 1x3 @ 3' 4 3/4" (ends cut at parallel 45 degree angles.  measured from long end to shot end on each side.)


Note:  Lucky for you, this was before I had a fancy cross cut miter saw, so although there are angled cuts, the angles are all 45 degrees and can be cut with a cheap miter box which is all I had at the time.  You will have to pay close attention to the direction of your cuts on the upright pieces/balusters, but just look closely at the illustration above and I think you can figure it out.In the diagram above and illustrations below, the blue and green sides will be attached to the the stairs; the yellow and purple sides parallel the front of the stairs. 

Important:  The diagram above is for a railing/storage stair combination attached to the right side of the bunk/loft bed.  If your stairs are on the left side, the angle on the bottom of the balusters needs to be reversed.  If you are confused, it may help you to keep the bottom edge square and physically hold the pieces in position on your staircase.  Then mark the angle direction with a pencil prior to cutting.   The top angle of the balusters are always 45 degrees and parallel the angle of the stairs. 

As with every plan I post, please proceed with the knowledge that I am NOT an expert, I am human and do make mistakes.  Build at your own risk, and always work carefully.  By building these plans, you assume all risks and release me from any liability.  I do not guarantee them in any way.  Please read through all directions before you begin.   With that in mind, if you still want to try them, I'd love to see and hear how your project turns out.  Please leave a comment and let me know what you think.

Step 1  Attach the cross braces to baluster 1 and 2 as shown.


Step 2 Attach the other end of the 10" cross brace to baluster 2.


Step 3 Attach the other end of the 14 1/2"(1'2 1/2") cross brace to baluster 3.  Note:  The bottom edges of baluster 2 and 3 should line up.


**In my original,  I inserted a decorative Masonite panel by cutting a channel (before assembly), about 1/4 - 1/2" deep and wide enough to accommodate the panel, into the bottom of the handrail, the top of the cross sections, and the front of the balusters above the cross section joint.  The panel is cut just shy of the channel depth added to each side.  I cut out random circle designs, then fitted the panel into the channels during assembly adding glue to keep them secure.


Step 4  Insert panels now if you are using channels.  
I messed up on this sketch.  The panel should stick out above the balusters a little, to fit into the grove on the bottom of the handrail.


Step 5  Add the hand rail.  

Step 6   Proceed to  my post Storage Stair System for a Bunk or Loft Bed - Free Plans to see how the 3 parts go together.

Please be sure to check  the original post about our boys room for pictures of the finished product, and while your at it, stop by to see my  other DIY projects.

Don't miss my other free plans!

Jan 8, 2014

Storage Stair System for a Bunk or Loft Bed - Free Plans


I designed this Storage Stair System for bunk/loft beds a while back as part of a boys' room makeover at our old house.  Since then, I've gotten so much positive feedback from the project that I wanted to share my plans.  You can access the FREE PLANS for each component by clicking the links below.  I have also posted some of my plans including the plan for the Mega Mom Board at ana-white.com, the website that inspired me and gave me the confidence to tackle this project. 

 *Disclaimer:  I am not an expert, I don't pretend to be an expert.  These plans are meant to show what I did and what has worked for our situation, not what you should do.  By using these plans, you assume all risks and responsibilities and release me from any liability.  I do not guarantee them in any way.  Build at your own risk, and check for safety issues before allowing your child to use anything you build.  

Don't miss my other free plans!


Final assembly directions are below along with an illustration of the loft bead footboard that I used.  You may need to make adjustments for your specific situation.

 Step 1 Attach Steps to Bed Frame.


Step 2 **Attach Bookshelf to Bed Frame and Steps.**


Step 3 Attach Railing to Book Shelf and Steps.


 **The Back of the Book Shelf Overhangs the Back Of the Steps to Accommodate the Baseboard.


Nov 10, 2013

Pumpkin Planter How to


Need a long lasting splash of color for your fall gatherings, but don't want to spend big bucks on a fussy arrangement from a florist that is just going to wilt and die after a few days?
 For about $5, and 10 minutes, this little cutie pie is easy on your eyes and your wallet.  And in my experience, can last up to a month inside or on a patio.


Step 1 Decide if you want to use a plastic liner(juice bottle).  

The benefit to using a liner, is that if you need the arrangement before Halloween, but not after, you can actually remove the liner and plant leaving a carve-able pumpkin shell, and a plant for your garden. 
However, by not using a liner, when the planter has severed it's purpose you can move it to the garden and plant it pumpkin shell and all.  The shell will compost and enrich the soil, while the flowers will continue to thrive (weather and climate permitting)

Step 2  Mark and Cut the opening.

If you are using a plastic bottle, go ahead and cut the bottle in half about  1 inch shorter than your pumpkin, and use the top section as a guide to mark the opening.  Without a plastic bottle, cut your hole at least as big as the root mass of the plant your using.

Step 3  Scoop out the guts.  

(optional)
If you are using the plastic bottle, slide it into the pumpkin and trim the top edge so it is flush with the pumpkin.

Step 4  Add the plant.  
Add extra dirt if needed so the plant is secure within the pumpkin shell, or plastic bottle.

Step 5 Water and admire.
Makes a sweet centerpiece, or add a few sticks and use it to display wares at fall craft shows.  It also makes fabulous Halloween decor adorned with "shrunken"  apple heads and "zombies".


Jun 21, 2013

Project #5: Window Seat with Storage Towers

If you follow my blog, you know about my dilemma choosing a project for the Birthday Build, and what I finally chose.  Here is the finished project and some pictures I took along the way


What a weekend!  It was an exhausting build, but so worth it.

We went from this


to this.


I love how his awkwardly sized Imaginext and Little People toys fit perfectly on the shelves.  That is what happens when you custom build something yourself.  you can measured the toys and built everything to fit them.  I also love how within a day of finishing the window seat, all of the stuffed animals had mysteriously migrated from the floor and bed to the bench.  I've been told they enjoy the view. 


This project has been in my mind since we moved in 8 months ago.  I walked in this room for the first time and thought "Wow!  This is the perfect place for a window seat!"  It was not however, the perfect time to build one.  We had to unpack and settle in first.  Besides, the windows were rotten.  They would pop open on their own in a strong wind, and were not very secure against our inquisitive 4 yr. old.  The shutters covering them were not  screwed in well, and I didn't like how they were configured to open toward each side and the middle of the double window.  It blocked the light, and I need light. 

Time passed, we unpacked had fabulous, new, secure, efficient, vinyl windows put in, and since the shutters no longer fit with the deeper windows, the shutters came off and lived propped against the new window opening.  

When I decided to build the window seat, I knew it was time to address the shutters.  The plan: take them out of their frames and reconfigure them so they open to the sides leaving the middle area free and clear of obstructions.  

To make this work, the trim around the windows was replaced with flat stock to give a nice flat wood edge I could screw into.  


I drafted up plans for the window seat and towers and we got our build on.  If you want to try something similar, but aren't comfortable drafting your own plans visit Ana White's site and check out her plans.  Her  rolling cubby bench minus the wheels would make a simple window seat and 5 cube tower bookshelf would work great for the towers.


Don't forget to check out my other DIY projects before you go.


Jun 14, 2013

The Birthday Build Winner

Drum roll......   and the winner is...

Something More Practical   a.k.a

A window seat and storage for the little guys room so I'll have someplace to put all of his toys.


Pictures coming soon!

Jun 11, 2013

Happy Birthday to me!

I got the best presents ever.  Gift cards to Home Depot, a "Bamboo" drawing tablet which is the coolest, but best of all time.  My marvelous mother in law is going to take the kids for a couple of days so hubby and I can work together on any building project I chose.  Now, what will I make?

Benchright Farmhouse Table

Wooden Ice Chest  like this beauty created by Jenny from Birds and Soap who has posted plans at Ana-White.com

Flip Top Storage Bench New Plans

or something more practical?

Jun 7, 2013

Plans for Bunk/Loft Bed Stair System Shallow Bookshelf


*BTW, I've made these plans available on Ana White's website.  You can find them at

http://ana-white.com/2013/05/plans/storage-stairs-bunk-or-loft-bed

A few people have asked about the steps I built a while back for my boy's room at the old house.  At the time, I built the loft bed from Ana White's plan with minor modifications.  However, I couldn't find plans that I liked for the stairs.  At least not free ones.  So with no experience, I drafted a set built them and couldn't be happier with how they turned out.

I love these stairs!  And why wouldn't I?
They have: 

  • 2 deep compartments which can store toys or extra bed linens
  • a shallow compartment in the top step that is perfect for treasures or those large flat books
  • a small shelf under the middle stair that fits a rolled up sleeping bag perfectly.
  • a large cubby under the top step that can be used as a crawl through, suitcase storage, could be divided into smaller cubbies or could have doors attached.  

Over a year later these storage stairs are still holding together beautifully even after the move.  Now, it is time to share the plans with you for free.  

The usual caveats apply.  I am no expert, build at your own risk and work carefully.  By building these plans you assume all risks and release me from any liability. I do not guarantee them in any way.  With that said, if you still want to try the plans I'd love to see and hear how your project turns out.  You can let me know in the comments section below.


Finished Dimensions:
34 5/8" H x 20" W x 42" D

Materials:
1x3 
3/4 plywood (I used Purebond)
Kreg Jig and 1 1/4  pocket screws
3 sets of hinges

Tools:
Table saw/ circular saw
tape measure
screwdriver
drill
pencil

Cut List:
3 - 1x3 @ 20 (tread brace of 3 steps)
4 - 10 3/4 x 10 3/4 (sides of bottom 2 steps)
2 - 5 3/4 x 17 1/2 (sides of top step)
2 - 20 x 9 1/2 (treads of bottom  and middle steps)
1 - 20 x 16 3/4 (tread of top step)
3 - 20 x 10 3/4 (front of bottom step, shelf and base of middle step)
1 - 20 x 22.5 (front of middle step)
2 - 20 x 33 7/8 (front and back of top step)
1 - 10 3/4 x 18.5 (bottom step base)
1 - 20 x 17 1/2 (top step base)
1 - 17 1/2 x 18 1/2 ( top step compartment base)

Step 1

  • Attach sides of the bottom step to the front of the bottom step from the inside with pocket screws.
  • Attach bottom step base from underneath with pocket screws.

Step 2
  • Attach sides of the middle step to the shelf of the middle step with pocket hole screws from the inside of the step.
  • Attach the front of the middle step from the inside with pocket screws.
  • Attach bottom step base from underneath with pocket screws.

Step 3


  •  Attach sides of the top step to top shelf compartment base with pocket hole screws from the inside of the step.


  • Attach front and back of top step from the inside with pocket screws.
  • Attach the top step base from underneath with pocket screws. (although the top step base is shown in the same color it is NOT the same size as the top shelf compartment base.

Step 4


  •  Join bottom to the middle with pocket screws, then middle to top in a similar fashion. I chose not to glue the top step to the middle step so I could take them apart to move them.  

Step 5
  • Add 1 x 3 tread braces to each step. Again, I used pocket holes screwed from the inside.  It would be easier to just screw down from the top.

Step 6
  • Attach the stair treads to each stair with hinges.


Step 7

  • Finish as desired.
  • Be sure to securely attach the stair to your bunk or loft bed.  I recommend placing the stairs between the wall and the bed or adding a stair rail, especially with younger kids.


Good Luck!

I now have free plans for all 3 parts shown above:  

stairs, 
bookshelf, 
and railing.  


To find the free plans and how to connect the finished parts please visit my post Storage Stair System for Bunk/Loft Beds.


Please check out all of my  DIY projects, and  free plans!

May 20, 2013

Free Storage Stairs Plans for a Loft Bed


*BTW, I've made these plans available on Ana White's website.  You can find them at

http://ana-white.com/2013/05/plans/storage-stairs-bunk-or-loft-bed

A few people have asked about the steps I built a while back for my boy's room at the old house.  At the time, I built the loft bed from Ana White's plan with minor modifications.  However, I couldn't find plans that I liked for the stairs.  At least not free ones.  So with no experience, I drafted a set built them and couldn't be happier with how they turned out.

I love these stairs!  And why wouldn't I?
They have: 

  • 2 deep compartments which can store toys or extra bed linens
  • a shallow compartment in the top step that is perfect for treasures or those large flat books
  • a small shelf under the middle stair that fits a rolled up sleeping bag perfectly.
  • a large cubby under the top step that can be used as a crawl through, suitcase storage, could be divided into smaller cubbies or could have doors attached.  

Over a year later these storage stairs are still holding together beautifully even after the move.  Now, it is time to share the plans with you for free.  

The usual caveats apply.  I am no expert, build at your own risk and work carefully.  By building these plans you assume all risks and release me from any liability. I do not guarantee them in any way.  With that said, if you still want to try the plans I'd love to see and hear how your project turns out.  You can let me know in the comments section below.


Finished Dimensions:
34 5/8" H x 20" W x 42" D

Materials:
1x3 
3/4 plywood (I used Purebond)
Kreg Jig and 1 1/4  pocket screws
3 sets of hinges

Tools:
Table saw/ circular saw
tape measure
screwdriver
drill
pencil

Cut List:
3 - 1x3 @ 20 (tread brace of 3 steps)
4 - 10 3/4 x 10 3/4 (sides of bottom 2 steps)
2 - 5 3/4 x 17 1/2 (sides of top step)
2 - 20 x 9 1/2 (treads of bottom  and middle steps)
1 - 20 x 16 3/4 (tread of top step)
3 - 20 x 10 3/4 (front of bottom step, shelf and base of middle step)
1 - 20 x 22.5 (front of middle step)
2 - 20 x 33 7/8 (front and back of top step)
1 - 10 3/4 x 18.5 (bottom step base)
1 - 20 x 17 1/2 (top step base)
1 - 17 1/2 x 18 1/2 ( top step compartment base)

Step 1

  • Attach sides of the bottom step to the front of the bottom step from the inside with pocket screws.
  • Attach bottom step base from underneath with pocket screws.

Step 2
  • Attach sides of the middle step to the shelf of the middle step with pocket hole screws from the inside of the step.
  • Attach front of middle step from the inside with pocket screws.
  • Attach bottom step base from underneath with pocket screws.

Step 3


  •  Attach sides of the top step to top shelf compartment base with pocket hole screws from the inside of the step.


  • Attach front and back of top step from the inside with pocket screws.
  • Attach the top step base from underneath with pocket screws. (although the top step base is shown in the same color it is NOT the same size as the top shelf compartment base.

Step 4


  •  Join bottom to the middle with pocket screws, then middle to top in a similar fashion. I chose not to glue the top step to the middle step so I could take them apart to move them.  

Step 5
  • Add 1 x 3 tread braces to each step. Again, I used pocket holes screwed from the inside.  It would be easier to just screw down from the top.

Step 6
  • Attach the stair treads to each stair with hinges.


Step 7

  • Finish as desired.
  • Be sure to securely attach the stair to your bunk or loft bed.  I recommend placing the stairs between the wall and the bed or adding a stair rail, especially with younger kids.


Good Luck!

I now have free plans for :  

stairs
and railing.  


To find the free plans and how to connect the finished parts please visit my post Storage Stair System for Bunk/Loft Beds.


Please check out all of my  DIY projects and free plans!