

** You can now find free plans for my bunk bed storage stair system here. **
Soon after our youngest was born, we entertained the idea of selling our less than 1700 sq. foot 3 BR/2 1/2 BA house and finding something more "comfortable" for our growing family. As luck would have it we stumbled upon a house we loved, with owners willing to wait until ours sold. We quickly decluttered, scoured our home, and got it listed. At the time, the baby was in a crib in our room and we were making the best of things until our house sold.
Then, things took a bit of a turn. The local housing market, which had been surprisingly stable compared to the rest of the nation, took a nose dive. Several other houses on our street went up for sale and the house we wanted to buy...
Well, lets just say thing's didn't quite go to plan.
So here we are, 3 years later in the same house we started in, with bigger kids and more stuff. The baby, now 3, shares a room with his 8 yr. old brother, and while they get along rather well, their things do not. Between Lego's and toddler toys and miscellaneous "treasures" that all boys seem to collect, there is hardly space in their room for a twin bed and a toddler bed, let alone room to sword fight and do all the things that little boys do.
With our youngest ready to move into a big boy bed, a rather large problem looms on the horizon. How on earth can we fit a second twin bed into the room? With moving not presently an option, we had to find a way to make the space work.
BEFORE: On a good day, it looked like this. BTW, the little guy had a toddler bed frame, but he refused to sleep anywhere except the floor so we just got rid of the frame.


Let the Planning begin!
- space for 2 twin beds, personal space for each boy to keep/display his "treasures"
- additional storage for toys, place for little guys clothes (they've been kept in our closet since he was born
- room for books
- floor space to play.
It also needed to be easy for the boys to clean up on their own (wishful thinking on my part), fun, affordable and ideally could continue to grow with them and suit future spaces should we move or add on to our home.
I scoured local stores, the internet, anything I could find for products, and inspiration, starting with a bed. Bunks beds seemed the logical choice. They're fun for kids and take up less space. The 8 yr old could sleep on top, and 3 yr old on bottom. But what happens when 3 yr old wants to climb the ladder, which he will?
We needed a bunk system with stairs. Stairs and storage!
The kids LOVED this bed from Furniture Row. But at 51"x84"x92" it was no space saver, and at $1098, it wasn't in the budget either. Plus, no stairs. Sorry kids.
 |
Oh and isn't this one just amazing! Totally impractical for us, but too cool not to share.

 |
| "Practice" bookcase and floating shelves from ana-white.com plan. |
Can we build it?
Since nothing we liked fit our budget or needs, I started thinking. Maybe we could build a bunk bed. True enough we didn't have the skills or tools, but we could borrow both from family, and I was willing to do my homework to save $$.
After a bit of hunting around for plans, I discovered the "Holy Grail" of all free plan sites.
The site didn't have exactly what I was after, but it did have several plans that were very close, and a nice tutorial on a program called "Google sketch-up", which I could use to modify the plans. Best of all, there was a brag board that showed pictures of projects from first-timers like us. If they could do it, so could we. So I practiced on a few small projects, asked for a table saw for Christmas, and polished my skills with sketch-up. By mid-March when my dear sweet mother-in-law offered to take the kids for 2 nights, hubby and I were ready to begin.
Yes we can !
Two days, several splinters and a few ciders later, not only had we repainted the boys room and cut down the plywood for all the projects, but we also had this to show for our efforts:
 |
| Same twin bed from before, new loft bed built from a modified version of Ana White's plan. Stairs designed by me. |
Two weekends later, though our organizing projects are just beginning, our building projects are complete, at least for now.

 |
The stairs got a much needed rail to steady the little
guy as he climbs up, and I built a narrow bookshelf
along the back wall. Big brother can display his smaller
Lego creations on the top 2 shelves and eventually put
books on his shelf like his baby brother has on the
"practice" shelf I made earlier.
|
 |
| Speaking of the practice shelf, it got a coat of paint and ABC's. |


That means you can use the space for storage, or remove the toys and use it as a tunnel, a cave, a tent, or even pretend you're Harry Potter. Someday soon I'll be adding doors to this area and the one on the other side of the stairs. Since my little guy loves to play "let's answer the door."

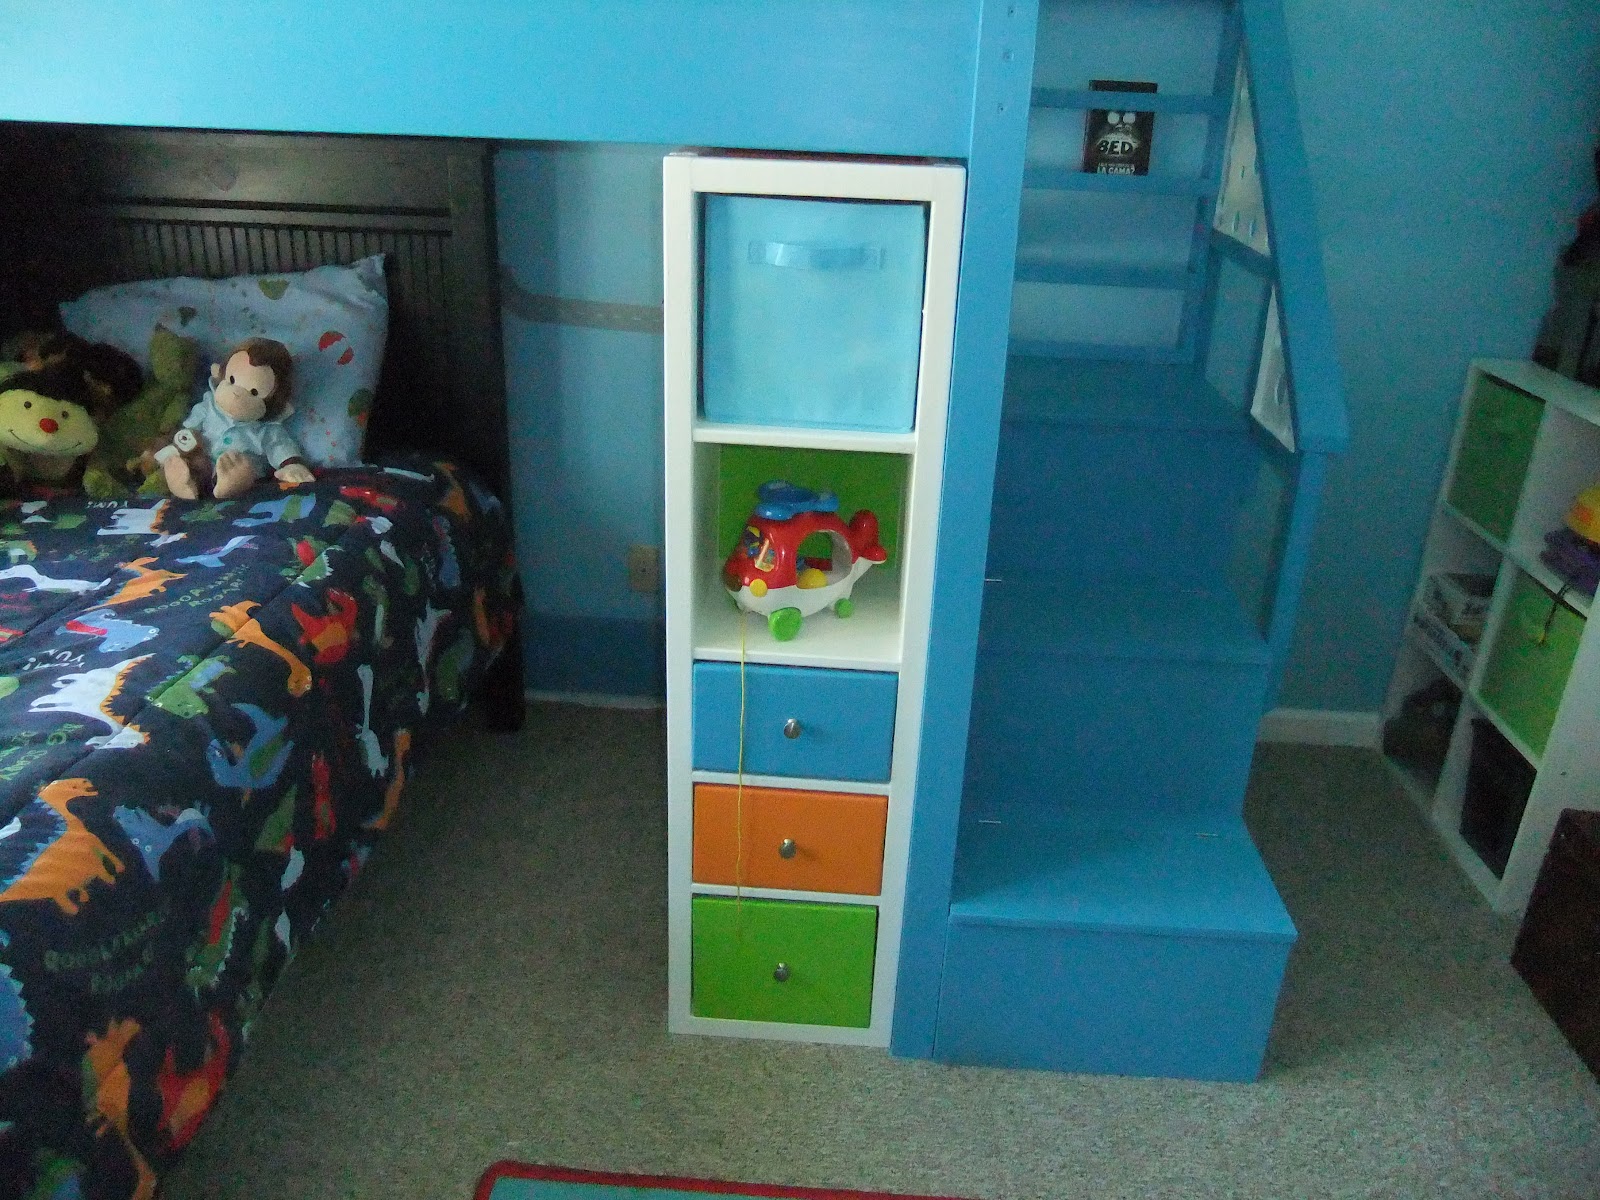
Did I happen to mention those stairs all have built in storage boxes, or that there is a storage cubby under the 2nd stair that is perfect for a sleeping bag, and display shelves on the side of the bed for a rock collection.


Oh, and one last thing.
Can you keep a secret?
I'm not at liberty to disclose the exact location, but somewhere, and I'm not saying where, but somewhere there is a secret compartment for all of big brothers top secret stuff.
If you like this, You'll LOVE
Free Plans for Loft/Bunk Bed Storage Stair System
(as seen above, includes stairs, book shelf and handrail)
My other DIY Projects.
If you like this, You'll LOVE
Free Plans for Loft/Bunk Bed Storage Stair System
(as seen above, includes stairs, book shelf and handrail)
My other DIY Projects.
and
All my Free Plans
including:
Free Plans for the Mega Mom Board
Wow! I'm so impressed! Your situation sounds very familiar. I might be contacting you for some design advice in the future. Give everyone a hug for me. Love, liz mcneilly
ReplyDeleteAmazing! What a great transformation. You did good, girl. Yoy should send this in to Better Homes and Gardens. Maybe you would win something!
ReplyDeleteAuntie Suki
Fantastic! You rock. Congratulations to you both for the wonderful job you did. Exxtremely impressive.
ReplyDeleteI found your bed on Ana's site and love it! Trying to modify one of hers and had a question about your stairs. How wide are they? We would like to build a double loft for my girls' room, and stairs might make the cut if I can fit them in.
ReplyDeleteThanks.
Made your loft bed stairs today.. so awesome.. need to paint yet, but not sure how to do the hand railing :(
ReplyDeleteThat's great! I hope everything went smoothly. We haven't reattached the rail since our move. I think it's stored in the attic. If I can find it, I'll draft some plans from it and post them here.
DeleteDo you mind me asking how much the lumber/supplies ran you for this project? I'm looking to make my son bunk beds for his 5th birthday coming up! Thanks, Nicole
ReplyDeletesandiegocoley at yahoo dot com
That's a tough question. We spent $1000 on the entire room, which included lumber to make the bed, stairs, storage unit under the bed, a small bookshelf next to the window, 2 floating shelves, a KREG jig, screws, glue, hardware, paint for everything including the walls, a new circular saw, some storage containers, new sheets and comforter for my older son plus a few decorative odds and ends.
DeleteUnfortunately, it was so long ago that my mommy brain can't give you anything more specific than that.
My suggestion if you want a really accurate estimate is go to Ana White's site (the Link is in the post above). Take a look at her materials list, then pull up the website for your favorite Hardware store, and search for each component. Then you just have to do the math. Lumber choice will make a huge difference in cost. Do yourself a favor and be very careful about choosing straight boards. Also, don't forget to include the little things like sales tax, hardware, glue, etc.
BTW, if you haven't checked it out yet, Ana's site has lots more bunk bed plans, and all her plans are free. Good Luck.