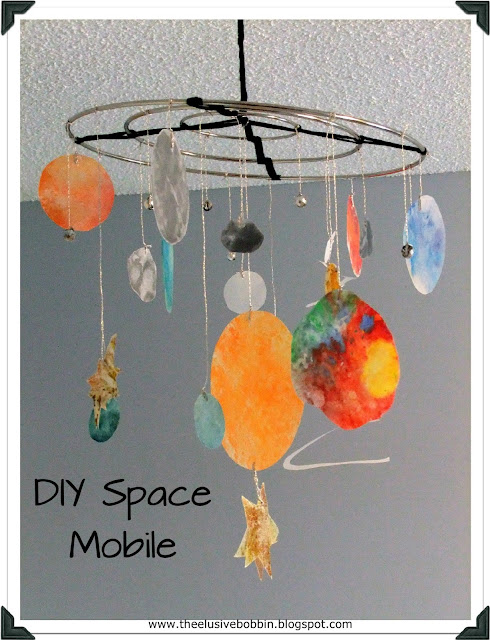
Last week was Spring Break here in Alabama. With the kids home for a few days, it was the perfect time to start a project for their rooms. A while back, I stumbled across several mobiles, on Pintrest, made of two or more sheets of waxed paper with crayon shavings melted between them. The process is super simple and the resulting mobiles are impressive. I'm sure better tutorials are out there, but this is how we did it.
Materials to Create "Stained Glass" Paper
- Waxed Paper
- Parchment Paper
- Crayons (old and gnarly are fine)
- iron
To Make "Stained Glass" Paper
Step 1: Prepare the waxed paper.
I used one sheet of waxed paper folded in half and then half again so the finished product would be 4 layers of waxed paper, with 2 on top of the crayon and 2 underneath.
Step 2: Grate, scrape, shave, or chop crayons into small pieces and place on waxed paper. Add as many or few colors as you like.
Step 4: Use an iron to melt crayon wax fusing the waxed paper together and let cool. Use a low setting just warm enough to melt the wax.(Fig. A)
Work carefully and don't forget wax is flammable. There is an art to this process that you figure out with practice. The appearance of the finished product depends on the quantity and color of crayon shavings you use, and how you press/iron the parchment. If you uses a sprinkling of wax shavings and "press" with a lifting motion (no sliding), til the crayons are just melted you end up with something that looks like confetti.(Fig. B) If you let the wax melt completely it spreads and the colors start to blend (Fig C). If you continue to apply heat and iron by move the iron back and forth spreading the melted wax thinly, you will end up with a translucent marbled effect. If you want your colors more intense, start with more crayon shavings. You can also add more shavings to an existing sheet by re-ironing to melt the wax and carefully separating the layers before the wax cools again.
We had lots of fun experimenting and honing our technique making the planets for the space mobile. This nebula was made using bright colors kept in separate piles, and blended during the ironing process.
Mobile Materials
- Stained Glass paper in desired shades (how to above)
- string
- needle or small hole punch
- mobile frame (mobile frame tutorial)
- beads or other found items you want to add
To Make Mobile
Step 1: Cut cooled paper into assorted shapes with sharp scissors.
For non geometric shapes like this Koi fish, make a pattern by drawing or printing the desired shape onto card stock and cutting that out first. Use a pencil or toothpick to trace the design onto the "stained glass" paper.
To make a swirl, first cut a circle then trace a small circle in the center and trace a spiral from the small center circles edge to the outer edge of the circle and cut along th line leaving the center circle entact. Carefully pull the spiral open. The smaller the distance between the cut lines of the spiral, the longer it will be.
Step 2: Carefully, punch a small hole with a needle or small hole punch in the top of each piece.
Step 3: Attach string through hole and tie each piece to mobile support of your choosing. Try to balance the distribution of pieces to keep the mobile balanced and visually appealing.
Step 4: Add beads or found items.
Step 5: Hang mobile and adjust pieces as needed.
 |
| Finished Space Mobile |
 |
| Finished Koi Mobile |
 |
| Part of the Mural in My daughter's Koi and Dragon themed room. |


No comments:
Post a Comment
Thank you for visiting and taking the time to comment. I moderate all comments. Please allow up to 24 hrs. for your comment to appear.
- Amy